Hey fellow craft enthusiasts! You know that feeling when you’ve poured your heart into a project, only to realize the final touch—the handle—just isn’t living up to your vision?
I’ve been there, countless times. It’s frustrating when you want that perfect blend of durability, style, and a truly personal touch, especially in a world increasingly craving unique, handmade items.
That’s why I absolutely fell in love with crafting my own leather handles, and let me tell you, it’s a total game-changer for any DIY project. There’s something incredibly rewarding about shaping a piece of leather into a functional work of art, giving your bags, furniture, or even home decor a luxurious, bespoke feel that mass-produced options simply can’t replicate.
With the huge push towards mindful consumption and sustainable practices, making your own leather components isn’t just a hobby; it’s a statement. It allows you to create pieces that aren’t just beautiful, but also built to last for years, often from ethically sourced or upcycled materials, adding so much more value and soul to your creations.
If you’re ready to unlock that next level of craftsmanship and truly make your projects shine with a touch of authentic elegance, then you’re in the right place.
I’ve put together everything you need to know from my own experience, so you can avoid the common pitfalls and get straight to creating something incredible.
Let’s explore this together and I’m going to show you exactly how to craft those stunning leather handles you’ve been dreaming of!
Unlocking the Secrets to Perfect Leather Selection
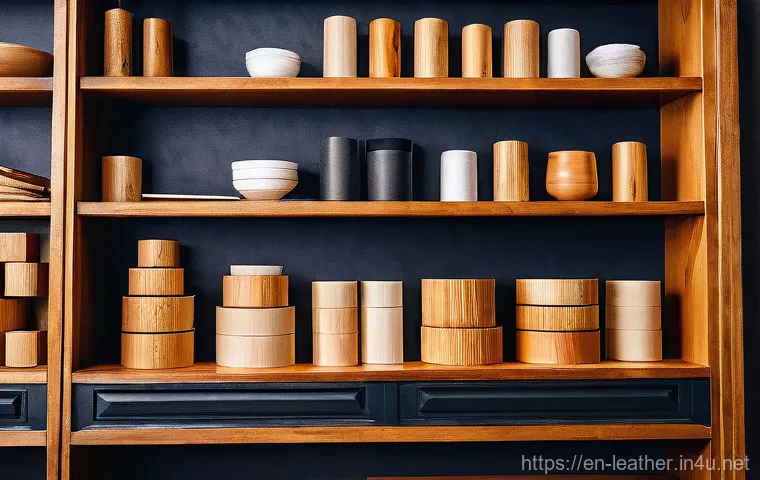
Okay, so you’re ready to dive into crafting your own leather handles, which is fantastic! But before you even think about cutting, there’s one crucial step that can make or break your project: choosing the right leather. Believe me, I’ve made my share of mistakes here. I remember early on, I tried to use a super soft garment leather for a tote bag handle, thinking it would be comfortable. It was comfortable, alright, but it also stretched and lost its shape in about two weeks! Talk about a learning curve! Different types of leather have unique characteristics that lend themselves to various applications, and for handles, you really need something that balances durability with a pleasing aesthetic. You want something that feels good in the hand, stands up to daily wear, and complements your project beautifully. It’s not just about what looks good on the roll; it’s about how it will perform under stress and over time. Think about the weight your handle needs to support, how often it’ll be used, and even the climate it’ll be exposed to. A bag handle, for instance, needs a totally different kind of resilience than a decorative pull on a drawer. Getting this right from the start saves so much frustration down the line, and honestly, it’s where the true craftsmanship begins.
Understanding Leather Types for Optimal Handle Durability
When I’m picking leather for handles, I usually lean towards vegetable-tanned or bridle leather, especially for projects that need a lot of structure and longevity. Vegetable-tanned leather is a classic for a reason; it’s incredibly durable, holds its shape beautifully, and develops a gorgeous patina over time. It’s also fantastic if you want to tool or stamp designs into your handles. My go-to for really sturdy bag handles or even furniture pulls is often a heavier weight veg-tan, around 7-9 oz (2.8-3.6mm). It’s a bit stiffer to work with initially, but the results are always worth the effort. Bridle leather, on the other hand, is a dream for its strength and weather resistance. It’s often infused with waxes and oils, making it super smooth and robust, perfect for those high-wear areas. I’ve used bridle leather for dog leash handles and backpack straps, and they hold up like champions, even after years of abuse. I’ve found that investing a little more in quality leather here truly pays off in the long run, extending the life and appeal of your entire project.
Sourcing Quality Leather: Where I Find My Materials
Finding good leather can feel a bit daunting when you’re starting out, but it doesn’t have to be. For me, local leather suppliers are always my first stop. Being able to see and feel the hides in person is invaluable. You can check for blemishes, consistency, and truly gauge the temper (how stiff or pliable it is). Online, I’ve had great success with dedicated leather suppliers who offer detailed descriptions and often swatches. Brands like Weaver Leather Supply or Tandy Leather are well-known, but I also love exploring smaller, independent tanneries or shops on platforms like Etsy for unique finds. Don’t be afraid to ask for samples, especially if you’re buying a larger quantity. I’ve also found some incredible upcycled leather from old furniture or vintage jackets – a treasure hunt that’s both sustainable and incredibly rewarding. Just make sure whatever you choose is appropriate for the stresses a handle will endure. I once bought some beautiful leather that turned out to be too thin for a bag handle, so now I always double-check the thickness and temper before committing!
Essential Tools: Gearing Up for Your First Project
Alright, now that you’ve got your leather picked out, let’s talk tools! When I first started, I thought I needed every single leather tool under the sun. My workbench was a chaotic mess of mallets, awls, and punches, most of which I barely touched. What I’ve learned through trial and error is that you really only need a handful of core tools to get started, and you can build your collection as your skills and projects evolve. Think of it like cooking – you don’t need a sous vide machine for your first omelet! Having the right basic tools, and knowing how to use them effectively, makes all the difference in achieving a professional-looking finish. There’s nothing more frustrating than trying to force the wrong tool to do a job, resulting in uneven cuts or messy stitches. Trust me, I’ve been there, staring at a wonky line wondering where I went wrong, only to realize my cutting mat was too old or my knife wasn’t sharp enough. A well-maintained, sharp set of basic tools will serve you far better than a multitude of neglected, dull ones.
Must-Have Cutting and Measuring Gear
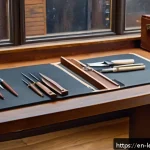
For cutting, a good, sharp utility knife or a leather craft knife is non-negotiable. I personally prefer a head knife for longer, straight cuts, but a rotary cutter can be incredibly efficient too, especially for repetitive shapes. Whatever you choose, keep it razor sharp; a dull blade is not only frustrating but also dangerous. Pair that with a sturdy metal ruler and a self-healing cutting mat – seriously, don’t skimp on the mat, it protects your surfaces and your blades. I once thought a regular cutting board would do, and let’s just say my kitchen counter still bears the scars! For measuring, a simple tape measure and a reliable scratch awl or silver gel pen are perfect for marking your cut lines. Don’t underestimate the power of accuracy here; even a millimeter off can throw off your entire handle’s symmetry. I always take my time with measuring and marking; it’s the foundation for a flawless final product.
Stitching and Assembly Essentials
When it comes to stitching, you’ll need some specific items. A good set of leather needles (saddler’s needles are my favorite, they’re blunt and won’t split the leather strands), strong waxed thread (polyester is highly durable), and a sharp awl or pricking irons for making your stitch holes. I swear by my pricking irons; they create perfectly spaced and angled holes, making hand stitching an absolute joy. Before I got them, I was poking holes individually with an awl, and my stitches looked like a drunk spider had gone for a stroll! You’ll also need a stitching pony or clam to hold your work securely while you stitch, which frees up both your hands. This is a game-changer for consistency and preventing hand fatigue. A rubber mallet is also handy for setting hardware or tapping down folds. These items, though seemingly small, collectively contribute to the professional finish and longevity of your leather handles.
Mastering the Art of Cutting and Shaping Leather
Once you’ve got your perfect piece of leather and all your trusty tools laid out, it’s time for the real magic to begin: cutting and shaping. This stage is where your vision truly starts to take form, and honestly, it’s one of the most satisfying parts of the process for me. There’s something incredibly therapeutic about the precise glide of a sharp blade through leather. However, it’s also where you can easily make irreversible mistakes if you rush or aren’t paying attention. I remember one early project where I was so excited to get to the stitching, I completely botched a long, straight cut, ending up with a wavy handle that was utterly unusable. Lesson learned: patience and precision are your best friends here. Think of each cut as a brushstroke; deliberate, controlled, and aiming for perfection. This isn’t just about slicing and dicing; it’s about understanding the grain of the leather, how it will react to tension, and setting yourself up for success in the subsequent steps. Every single curve and straight line contributes to the overall aesthetic and functionality of the finished handle, so a little extra care now pays huge dividends later.
Precision Cutting Techniques for Clean Edges
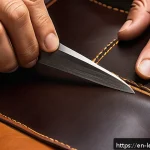
For clean, crisp cuts, the key is a consistently sharp blade and firm, even pressure. When using a utility knife or craft knife, always use a fresh blade or hone your existing one before starting. A dull blade will tear and drag, giving you ragged edges that are a nightmare to finish. I always use a sturdy metal ruler as a guide, making sure to press down firmly to prevent any slippage. For long cuts, I prefer to make several shallow passes rather than trying to cut all the way through in one go. This gives me more control and reduces the chance of veering off course. For curves, a sharp swivel knife or even a very small, sharp utility knife can work wonders with practice. I often trace my curve template onto the leather first with a silver gel pen, then carefully follow the line, rotating the leather as I go for smooth, fluid arcs. Don’t be afraid to take your time; a slow, steady hand is far more effective than a quick, erratic one. Seriously, my mantra for cutting is “slow and steady wins the race!”
Shaping and Preparing Your Handle Strips
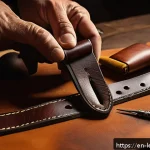
After cutting your basic strips, the real shaping begins. This is where you might round off corners, bevel the edges, or skive the leather. Beveling, which involves trimming off the sharp corners of your leather, is something I never skip. It makes the handle much more comfortable to hold and gives it a professional, finished look. I use a dedicated edge beveler for this, ensuring a consistent angle around all edges. Skiving, or thinning the leather, is crucial if you’re planning to fold the leather or join pieces where you want less bulk. For example, if I’m making a folded handle, I’ll skive the edges that will overlap to reduce the seam thickness. I use a skiving knife for this, taking very thin passes to avoid cutting too deeply. It takes a bit of practice to get a consistent skive, but it’s a skill that elevates your work significantly. I remember being so nervous about skiving initially, thinking I’d ruin the whole piece, but with a sharp blade and a gentle touch, it’s totally achievable!
Bringing It All Together: Stitching for Strength and Style
Now, this is where your leather handle truly comes alive! Stitching isn’t just about holding pieces together; it’s an art form that adds immense strength, character, and undeniable style to your creations. There’s something incredibly satisfying about watching a series of perfectly executed stitches transform separate leather pieces into a cohesive, robust handle. I still remember the first time I managed a truly neat saddle stitch – it felt like a monumental achievement! Before that, my stitches looked… well, let’s just say they had character, but not the good kind. The secret sauce here lies in precision, patience, and understanding the mechanics of a good stitch. It’s not just about pushing a needle through a hole; it’s about creating a uniform, strong seam that can withstand the rigors of daily use. A well-stitched handle is a testament to your craftsmanship and will outlast mass-produced alternatives by years. This is where your personal touch truly shines through, demonstrating the dedication and care you’ve poured into your project.
The Art of the Saddle Stitch
My absolute favorite, and arguably the strongest, method for stitching leather handles is the saddle stitch. Unlike a sewing machine stitch, which uses two independent threads that can unravel if one breaks, the saddle stitch uses a single piece of thread passed through each hole in a continuous, overlapping pattern. This creates an incredibly durable, interlocking stitch that holds even if one side of the thread breaks. To achieve this, I always start by marking my stitch lines evenly with a wing divider and then using pricking irons to create perfectly spaced holes. Consistency in hole spacing is key here for a beautiful, straight stitch line. I then use two needles, one on each end of a long piece of waxed thread, passing them through the holes from opposite sides. It takes a bit of rhythm and practice, but once you get the hang of it, it’s meditative and rewarding. I always pull each stitch tight with even tension; this is crucial for durability and a neat appearance. My early stitches were a bit loose, which meant the handle felt less sturdy, but now I know the importance of that satisfying “pop” as the thread snugs into place.
Securing Hardware and Finishing Stitch Lines
Beyond the basic stitch, securing hardware like D-rings, buckles, or rivets is often part of the handle assembly. For these, I typically use a combination of stitching and rivets for maximum security. When stitching around hardware, I make sure to create extra reinforcement stitches at the stress points, often doubling back a few times. For example, if I’m attaching a strap to a D-ring, I’ll stitch a box pattern or an “X” pattern within a box, then add a couple of solid brass rivets for extra peace of mind. Rivets are fantastic for adding a robust, industrial look and incredible strength. Just make sure to choose the right size and type for your project and use a proper rivet setter to ensure they’re securely fastened without damaging the leather. When finishing a stitch line, I always backstitch a few stitches and then trim the excess thread flush with the leather, melting the ends slightly with a thread zapper or lighter to prevent unraveling. This little detail makes all the difference in a truly professional finish – no one wants to see loose thread ends!
The Finishing Touches: Elevating Your Handmade Handles
You’ve cut, you’ve shaped, you’ve stitched – your leather handle is really starting to look amazing! But trust me, the finishing touches are what truly elevate your work from “handmade” to “expertly crafted.” This is the stage where you refine the edges, condition the leather, and apply any final polishes that make your handle feel luxurious and look utterly professional. It’s like putting on your best suit and adding a silk tie – it just completes the ensemble. I’ve seen so many otherwise beautiful projects fall short because the edges were left rough or the leather looked dry and neglected. Don’t skip these steps! They’re not just about aesthetics; they also contribute significantly to the handle’s durability and comfort. A well-finished edge, for instance, prevents fraying and makes the handle much more pleasant to hold. This is your chance to really show off the quality of your work and prove that handmade doesn’t mean amateur. I always tell myself that the last 10% of effort in finishing makes 90% of the difference in perception.
Perfecting the Edges: Burnishing and Painting
Rough edges on leather handles are a pet peeve of mine, and thankfully, there are two fantastic ways to tackle them: burnishing or edge painting. For a natural, classic look, burnishing is my go-to. After beveling the edges, I lightly dampen them with water or a specific burnishing compound (like Tokonole or Gum Tragacanth). Then, I use a wood slicker or canvas cloth and rub vigorously until the fibers lay down and create a smooth, glossy edge. It takes a bit of elbow grease, but the transformation is incredible. I remember my first few attempts, I didn’t rub hard enough, and the edges looked fluffy. Persistence is key! For a more vibrant or precisely colored edge, I turn to edge paint. This involves applying multiple thin coats of specialized paint, allowing each to dry and sometimes sanding lightly in between, until you achieve a smooth, durable, and perfectly colored edge. It’s particularly effective on more modern designs or when you want a contrasting color. I’ve found that using a roller tool specifically designed for edge painting gives the most consistent and professional results.
Nourishing Your Leather: Conditioning and Protection
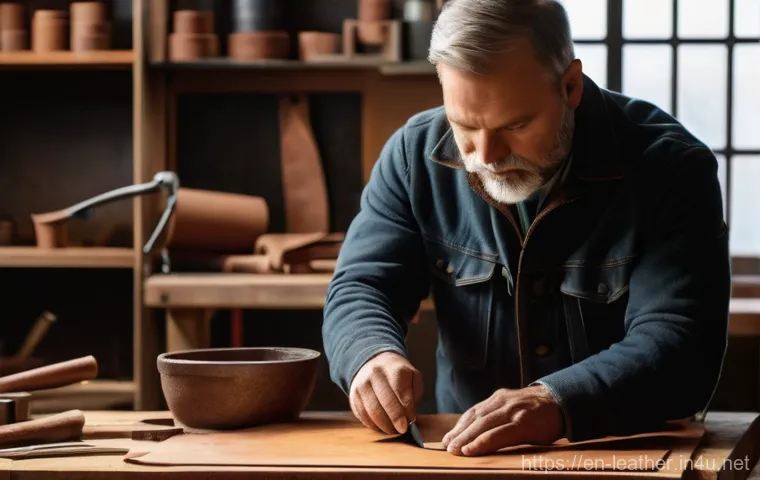
Just like your skin, leather needs hydration and protection to stay supple and beautiful. Conditioning your finished handles is vital for their longevity and to bring out the leather’s natural luster. I typically use a good quality leather conditioner or balm, working it into the leather with a soft cloth. This replenishes the natural oils, prevents drying and cracking, and can even help to buff out minor scuffs. It’s a satisfying final step, seeing the leather drink in the conditioner and transform into an even richer, more vibrant shade. For an extra layer of protection, especially for items that will see a lot of outdoor use, I might apply a water-resistant finish or wax. This helps to repel moisture and stains, keeping your handles looking fresh for longer. I’ve learned from experience that a little maintenance goes a long way; a well-conditioned handle not only looks better but feels better and will undoubtedly stand the test of time, proudly displaying its beautiful patina.
Creative Twists: Personalizing Your Leather Creations
Once you’ve nailed the basics of crafting leather handles, the real fun begins: making them uniquely yours! This is where your personality gets to shine through, and you can truly transform a functional component into a signature design element. I absolutely love experimenting with different ways to add that “extra something” that makes a handle stand out from the crowd. It’s all about infusing your projects with a touch of personal flair, moving beyond mere utility to create something that sparks joy and tells a story. I’ve found that even small details can make a monumental difference in the overall perception of a piece. Why settle for generic when you can have extraordinary? This stage is where you get to unleash your inner artist and really differentiate your work. Forget what’s “expected” and instead, think about what makes you smile when you look at it. Trust me, the effort you put into personalization will be reflected in the admiration your creations receive.
Incorporating Unique Textures and Embellishments
There are so many fantastic ways to add texture and unique embellishments to your leather handles. One of my favorite techniques is subtle tooling or stamping. Even a simple border stamp or an initial can add a bespoke touch. I remember making a handle for a custom-ordered bag, and I stamped the recipient’s initials on the inside – they absolutely loved that personal detail! You can also experiment with different types of leather that inherently have more texture, like pebble grain or alligator embossed leather. For a more tactile feel, braiding leather strips to form a handle or wrapping a core with a thin leather lace can create a stunning visual and textural appeal. Another idea is to incorporate contrasting materials. Imagine a leather handle with a subtle fabric inlay or small metal studs along the edges. I once saw a handle with tiny, meticulously placed beadwork, and it was breathtaking. Don’t be afraid to think outside the box; sometimes the most unexpected combinations create the most striking results.
Dyeing and Antiquing for Distinctive Finishes
Color is such a powerful tool in personalization, and dyeing your leather handles opens up a whole spectrum of possibilities beyond the natural leather tones. You can achieve vibrant, bold colors or subtle, antiqued finishes, depending on the dye and technique you choose. For a deep, uniform color, I prefer spirit-based leather dyes, applying multiple thin coats until I reach the desired saturation. Always test on a scrap piece first, as the final color can vary depending on the leather. For a more rustic, aged look, antiquing gels or stains are fantastic. They settle into the tooling and imperfections, highlighting textures and giving the leather a beautifully worn-in character. I’ve used antiquing agents to give new veg-tan leather an instant vintage vibe, which works perfectly for heritage-style bags. You can also play with resist techniques, where you apply a resist substance before dyeing to create patterns or leave certain areas undyed. The possibilities are truly endless, allowing you to match your handle perfectly to your project’s aesthetic or create a striking contrast that makes it pop.
Common Challenges and How I Overcame Them
Let’s be real, no crafting journey is without its bumps in the road, and making leather handles is no exception. I’ve certainly had my fair share of “oops” moments, from crooked cuts to frustratingly uneven stitches. It’s easy to get discouraged when things don’t go perfectly, especially when you’ve poured time and effort into a project. But here’s the thing I’ve learned: every single mistake is just a stepping stone to becoming better. It’s an opportunity to learn, adjust, and refine your techniques. I remember one time, I spent hours meticulously stitching a handle, only to realize I had somehow twisted one of the loops before finishing, making the handle sit awkwardly. It was so frustrating! But instead of giving up, I carefully unpicked the stitches and redid it, slower and more deliberately. The second attempt was flawless, and the sense of accomplishment was immense. Don’t let perceived failures derail you; see them as essential parts of your learning curve. This is where resilience and a problem-solving mindset truly pay off.
Tackling Uneven Cuts and Wobbly Stitches
Uneven cuts were one of my earliest and most frequent frustrations. My solution? Sharpness and a firm hand. I quickly realized that a dull blade causes more problems than it solves, tearing the leather rather than cleanly slicing it. Investing in a good sharpening strop or a continuous supply of fresh utility knife blades made a world of difference. For long, straight cuts, I learned to press my metal ruler down with almost my entire body weight to prevent it from shifting. As for wobbly stitches, that’s almost always a sign of inconsistent hole spacing or uneven tension. I found that using pricking irons rather than freehand awl punching created much more consistent holes, which naturally led to straighter stitches. And then, it’s all about practice and maintaining even tension with both hands as you push and pull the needles. I started practicing on scrap pieces, focusing solely on stitch consistency, before moving to my actual projects. It’s like learning to ride a bike; you fall a few times, but then it just clicks.
Dealing with Stubborn Leather and Misaligned Hardware
Sometimes, leather itself can be a challenge. Thicker, stiffer leathers can be tough on the hands and hard to manipulate. For these, I’ve found that pre-creasing or lightly dampening the fold lines can make them more pliable. Sometimes, a quick tap with a mallet on a folded edge can “set” it into place. Another common headache is misaligned hardware – attaching a D-ring slightly off-center can throw off the entire look. My trick for this is to always mark and double-check all my hole placements for rivets or stitching points before committing. I often use a temporary adhesive or even masking tape to hold the hardware in place while I make my final marks. If I’m riveting, I always do a test run on scrap leather to ensure the rivet setting tool is adjusted correctly and won’t damage the visible side of my handle. Patience and verification before permanent actions are my guiding principles when dealing with these tricky bits. It’s truly amazing how much frustration a few extra seconds of checking can prevent!
| Leather Type | Best For | Pros | Cons |
|---|---|---|---|
| Vegetable-Tanned Leather | Structured bags, belts, tool handles | Durable, molds well, ages beautifully (patina), carves/stamps well | Can be stiff, needs conditioning, takes time to break in |
| Chrome-Tanned Leather | Softer bags, garments, flexible straps | Soft, supple, wide color range, resistant to water/stains | Doesn’t hold shape as well, harder to tool/carve, less durable for high stress |
| Bridle Leather | Heavy-duty straps, equestrian gear, bag handles | Extremely strong, weather-resistant, smooth finish, holds shape | Can be expensive, typically thicker and stiffer |
| Oil-Tanned Leather | Rustic bags, satchels, durable straps | Soft, pliable, water-resistant, “pull-up” effect (lighter color when stretched) | Can be oily to touch, color may rub off, less structured |
Keeping Your Leather Handles Looking Brand New
You’ve poured your heart and soul into crafting those gorgeous leather handles, and now you want them to last, right? Just like a beloved pair of leather boots, your handmade handles need a little tender loving care to maintain their beauty and integrity over the years. This isn’t just about cleaning; it’s about proper maintenance that prevents drying, cracking, and premature wear. I’ve seen too many beautiful leather items deteriorate because their owners neglected this crucial step. It’s a bit like owning a vintage car; you wouldn’t just drive it without regular oil changes and washes, would you? The same goes for your leather creations. A little bit of routine care can significantly extend the life of your handles, allowing them to age gracefully and develop that coveted, rich patina that only time and careful handling can achieve. Think of it as an ongoing relationship with your craft – a little attention ensures a long and happy life together!
Routine Cleaning and Conditioning
For everyday cleaning, a soft, slightly damp cloth is usually all you need to wipe away dust and light grime. Avoid harsh chemicals or excessive water, as these can strip the leather’s natural oils and cause damage. For deeper cleaning, or if your handles have picked up some heavier dirt, I recommend using a specialized leather cleaner. Apply it sparingly to a clean cloth, gently wipe the handles, and then buff dry with another clean cloth. After cleaning, conditioning is paramount. I typically condition my heavily used leather items every few months, or whenever the leather starts to feel a bit dry or stiff. A good quality leather conditioner or balm, worked in with a soft cloth, will replenish moisture, keep the leather supple, and prevent cracking. I remember a bag handle I made that started to feel really dry after a summer of heavy use; a good conditioning session brought it right back to life, feeling soft and looking nourished again. It’s truly amazing what a little moisture can do!
Protecting Against Wear and Environmental Factors
Beyond cleaning and conditioning, protecting your leather handles from environmental stressors is key. Direct sunlight and extreme heat can dry out and fade leather over time, so try to store your items in a cool, dry place away from windows or heaters. Moisture is another big one; if your handles get wet, don’t try to dry them quickly with a hairdryer! Let them air dry naturally, away from direct heat, and then recondition them once they’re fully dry. This prevents the leather from becoming brittle. For items that see a lot of outdoor use, or if you live in a particularly humid climate, consider applying a water-resistant leather protector or wax periodically. This creates a barrier against moisture and stains, helping to preserve the handle’s finish. I always make sure my outdoor gear’s leather handles are well-waxed, especially before a hiking trip. It’s a small step that makes a huge difference in preventing water damage and keeping them looking great, no matter what the elements throw at them.
To Conclude
And there you have it, fellow crafters! From the initial thrill of selecting that perfect hide to the meticulous art of the final stitch, we’ve walked through every step of creating truly exceptional leather handles. It’s a journey that demands patience, precision, and a passion for the craft, but the reward of holding a beautifully finished, durable piece that you’ve made with your own hands is absolutely unparalleled. I hope sharing my experiences and a few hard-won lessons has inspired you to embark on your own leatherworking adventures, or perhaps to simply appreciate the artistry behind these everyday items even more. Remember, every project is a chance to learn, to grow, and to infuse a piece of yourself into something truly special. Keep creating, keep learning, and most importantly, keep enjoying the process!
Useful Information to Know
1. Always test new dyes or finishes on a scrap piece of the exact leather you’re using. Leather can react differently depending on its tannage and origin, and a quick test swatch can save you from a major disappointment on your main project. It’s a habit I picked up after an unfortunate bright blue incident!
2. Don’t be afraid to invest in quality tools as you progress. While a basic kit is great for starting, sharper knives, better pricking irons, or a dedicated burnishing motor will not only improve the quality of your work but also make the crafting process much more enjoyable and less fatiguing in the long run.
3. Join a local leatherworking group or online forum. The community aspect is invaluable; you can ask questions, share tips, and get feedback on your work from experienced crafters. I’ve learned so much from others, and it’s a fantastic way to stay motivated and discover new techniques.
4. Keep a small notebook or journal for your projects. Jot down details like the type of leather, weight, tools used, and any challenges or successes. This becomes a precious reference guide for future projects and helps you refine your process over time. I still flip through my old notes for inspiration!
5. Consider the “stress points” of your handle in its intended use. Will it carry heavy items? Be exposed to rain? Thinking about these factors during the design and construction phase, from reinforcing stitches to choosing weather-resistant leather, ensures your handle stands the test of time and truly performs its function.
Key Takeaways
Crafting durable and stylish leather handles is a rewarding process that hinges on a few core principles. First and foremost, selecting the right leather is paramount; different projects demand different properties, with vegetable-tanned or bridle leather often being ideal for their strength and longevity. Think about the application, whether it’s a sturdy bag strap or a decorative pull, and choose accordingly. Secondly, a well-equipped toolkit with sharp, reliable instruments for cutting, stitching, and finishing is non-negotiable for achieving professional results. My experience has shown that investing in quality here prevents endless frustration and elevates your craftsmanship. Precision in cutting and shaping, followed by the robust elegance of a saddle stitch, are the hallmarks of a truly excellent handle. These steps not only ensure structural integrity but also contribute significantly to the aesthetic appeal. Finally, don’t overlook the finishing touches and ongoing maintenance. Burnishing edges, conditioning the leather, and protecting it from environmental stressors ensures your handmade handles not only look incredible but also age gracefully, telling a story of quality and care for years to come. Remember, every piece you create is a testament to your skill and dedication!
Frequently Asked Questions (FAQ) 📖
Q: Why bother making my own leather handles when I could just buy them off the shelf?
A: Oh, this is a question I get all the time, and it hits home for me because I used to think the same thing! But trust me, once you dive into crafting your own leather handles, you’ll quickly see it’s about so much more than just a functional piece.
It’s about infusing your project with a soul that mass-produced options just can’t replicate. When you make a handle yourself, you’re not just attaching something; you’re adding a story, a bespoke touch that screams “handmade with love.” I remember making my very first custom handle for a tote bag, and the moment I attached it, the whole bag transformed.
It went from “nice” to “wow!” The durability, the unique texture, the way it perfectly complements your design – you get to control every single detail, from the type of leather to the stitching color.
Plus, there’s an incredible sense of accomplishment that comes from holding something you crafted with your own hands. It’s a genuine personal touch that stands out, and your friends will definitely notice and ask where you got it!
Q: What’s the absolute first step or the most crucial thing to know when I’m just starting out with crafting leather handles?
A: Okay, this is super important, especially if you want to avoid the common frustrations I definitely ran into when I was starting! My biggest takeaway, and what I always tell beginners, is to invest in good quality tools and leather from the get-go.
It might sound obvious, but trust me, trying to cut corners here will lead to a world of headaches – uneven cuts, struggling with dull tools, and ultimately, a less satisfying result.
Think of it like cooking: you can’t make a gourmet meal with blunt knives and questionable ingredients. For leather handles, a really sharp cutting tool like a good utility knife or rotary cutter, a sturdy cutting mat, and some decent quality leather scraps are your absolute essentials.
Don’t skimp on these! You don’t need a huge, expensive kit to start, but having those fundamental, reliable tools makes the learning process so much smoother and more enjoyable.
And honestly, it sets you up for success right from your very first project, which is super motivating!
Q: Is making leather handles really sustainable and worth the effort for the long term?
A: Absolutely, and this is one of the aspects that truly drew me into leather crafting! In a world where we’re constantly looking for ways to be more mindful about our consumption, making your own leather handles ticks so many boxes.
For starters, you can often source leather remnants or upcycled pieces, giving new life to materials that might otherwise go to waste. I’ve found some amazing deals on beautiful leather scraps that are perfect for handles, reducing demand for brand new materials.
Beyond that, when you craft something yourself, you’re inherently building it to last. Think about it: you’re putting in the time, effort, and quality materials because you want it to endure.
Unlike fast fashion or cheaply made accessories that fall apart after a few uses, a well-made leather handle will age beautifully, developing a unique patina over time, and can literally last for years, even decades.
It’s not just a hobby; it’s a commitment to creating durable, meaningful pieces that stand the test of time, contributing to a more sustainable lifestyle.
It feels incredibly rewarding to know your creations aren’t just beautiful, but also kind to the planet in their own way.