Leather crafting, a timeless art form, allows for incredible creativity and personalization. Among the many techniques, leather weaving stands out for its unique texture and visual appeal.
I’ve always been drawn to the intricate patterns that can be achieved through this method, turning simple strips of leather into something truly special.
From belts and bags to decorative accents, the possibilities are vast. It’s a skill that adds a touch of sophistication and handcrafted charm to any leather project.
Let’s dive deeper into the world of leather weaving! Discover more about this exciting craft below!
Alright, let’s weave some words together!
Discovering the Best Leather for Weaving
Choosing the right leather is crucial. I remember when I first started, I grabbed whatever scraps I could find. Let me tell you, some leathers are way easier to work with than others!
Vegetable-tanned leather is my go-to because it’s sturdy but still flexible enough to weave intricate patterns. Chrome-tanned leather can work in a pinch, but it’s often too stretchy and doesn’t hold its shape as well.
Trust me, the right leather can make or break your project. I learned this the hard way after spending hours on a piece only to have it warp and sag later on.
Understanding Leather Weight and Thickness
* Thin Leather (2-3 oz): Great for delicate weaves and accents. It’s easy to manipulate but might not be durable enough for high-wear items like belts.
I used this for a small decorative piece once, and it turned out beautifully! * Medium Weight Leather (4-5 oz): A sweet spot for many projects. It’s sturdy enough for bags and belts while still being manageable for weaving.
This is the weight I usually recommend to beginners. * Heavy Leather (6-7 oz): Best for items that need extra durability, like heavy-duty belts or the straps of a tote bag.
It can be a bit tough to weave, but the result is a super sturdy, long-lasting piece.
Considering the Grain
* Full-Grain Leather: The highest quality, showing the natural grain and imperfections of the hide. It’s tough and develops a beautiful patina over time.
I’ve made some stunning belts with full-grain leather. * Top-Grain Leather: The top layer of the hide is sanded and finished to remove imperfections.
It’s still durable but doesn’t have the same character as full-grain. * Genuine Leather: Often refers to the lower layers of the hide. It’s the least expensive but also the least durable.
It’s alright for practice, but I wouldn’t use it for anything you want to last.
Preparing Your Leather Strips for Weaving
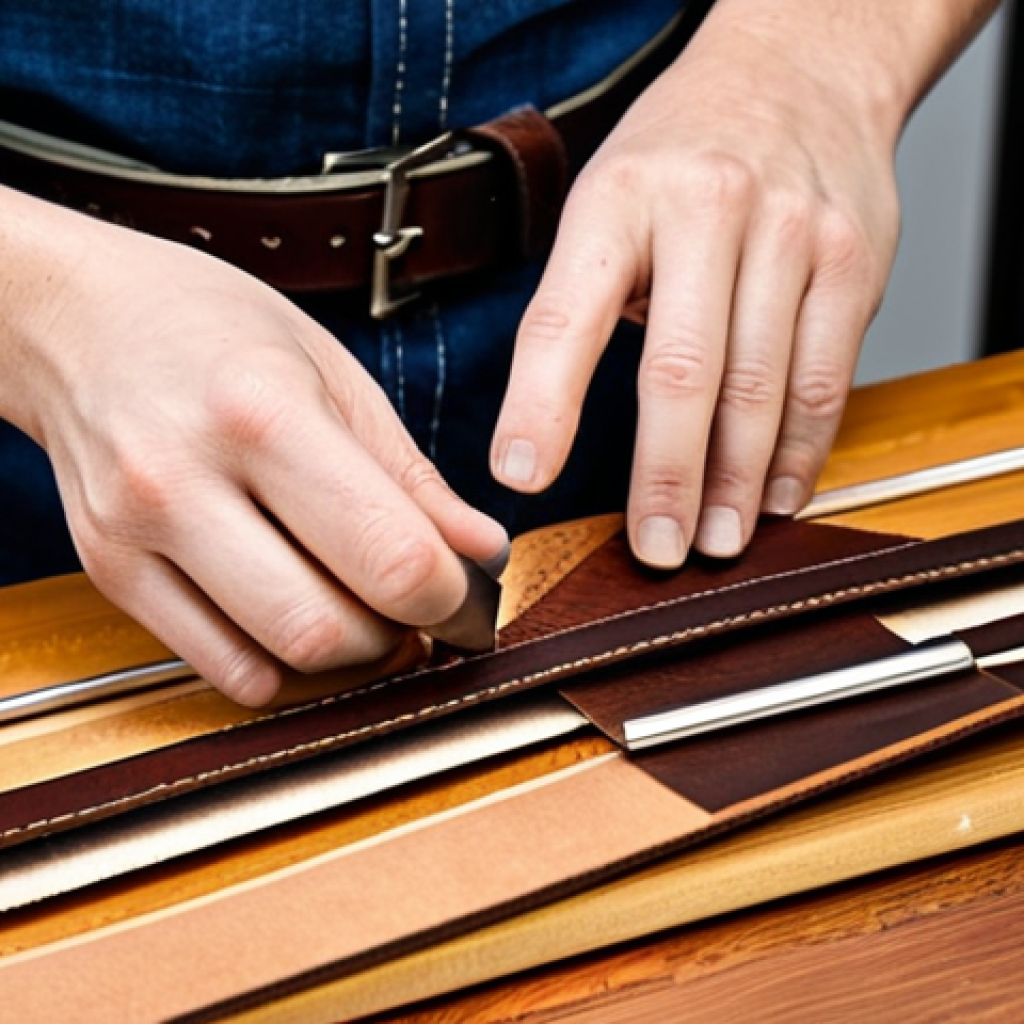
Getting your leather strips ready is key for a clean, professional look. I’ve found that precision is everything here. Uneven strips can throw off your entire weave, leading to a wonky final product.
A good rotary cutter and a ruler are your best friends. Also, don’t underestimate the importance of sharp blades – they make a world of difference! I ruined a few projects early on by using dull blades, resulting in frayed edges and inconsistent widths.
Cutting Straight and Consistent Strips
* Use a Rotary Cutter: This tool provides the cleanest, most accurate cuts. I prefer it over scissors or knives for long strips. * Invest in a Good Ruler: A clear acrylic ruler with grid lines helps keep your cuts straight and consistent.
* Marking and Measuring: Always mark your cutting lines beforehand. Measure twice, cut once! This old saying holds true, especially with leather.
Evening Edges and Ensuring Uniform Width
* Beveling the Edges: This gives your strips a smoother, more refined look. A beveling tool is a worthwhile investment. * Sanding: Lightly sanding the edges of your strips can remove any remaining burrs or imperfections.
* Consistent Width: Double-check the width of your strips periodically as you cut. Slight variations can add character, but too much inconsistency can be problematic.
Basic Weaving Patterns to Get You Started
Okay, let’s talk patterns. When I first started, I was all about trying the most complicated designs I could find. Big mistake!
Start with the basics. The plain weave is your foundation. Once you’ve mastered that, you can move on to more complex patterns like the twill or basket weave.
Each pattern creates a different texture and visual effect, so experiment and see what you like best.
Plain Weave: The Foundation
* Alternating Strips: The plain weave involves simply alternating the over-under pattern with each strip. It’s the simplest and most straightforward method.
* Tightening and Securing: Make sure to pull the strips tight as you weave to maintain a consistent tension. This prevents gaps and ensures a neat finish.
Twill Weave: Adding Diagonal Texture
* Offsetting the Pattern: In a twill weave, the over-under pattern is offset by one position with each row. This creates a diagonal rib effect. * Varying the Offset: You can vary the offset to create different twill patterns.
Experiment with offsetting by two or three positions for a more pronounced effect.
Basket Weave: A More Complex Look
* Multiple Strips: The basket weave involves weaving multiple strips together at once, creating a thicker, more textured pattern. * Alternating Groups: Alternate the groups of strips with each row, weaving them over and under the opposing groups.
Troubleshooting Common Weaving Issues
Weaving isn’t always smooth sailing. I remember one time, I was working on a large bag, and halfway through, I realized I’d made a mistake in the pattern.
Ugh! It was so frustrating, but I learned a valuable lesson: patience and attention to detail are key. Uneven tension, warped edges, and pattern mistakes are all common problems, but with a little practice, you can overcome them.
Addressing Uneven Tension
* Consistent Pull: Ensure you’re pulling each strip with the same amount of tension. Use your fingers to guide the strips and maintain even pressure.
* Adjusting as You Go: If you notice areas where the tension is too tight or too loose, gently adjust the strips to even it out.
Correcting Warped Edges
* Proper Preparation: Make sure your strips are cut straight and consistently. Warped edges are often the result of uneven cuts. * Blocking: If your woven piece is already warped, you can try blocking it.
Dampen the leather, stretch it into the desired shape, and let it dry.
Fixing Pattern Mistakes
* Careful Counting: Pay close attention to the pattern as you weave. Count the strips to ensure you’re maintaining the correct sequence. * Backtracking: If you spot a mistake, don’t be afraid to undo your work and correct it.
It’s better to fix it early than to continue weaving with an error.
Finishing Touches: Securing and Enhancing Your Woven Leather
The finishing touches are what really elevate your woven leather project. When I first started, I didn’t pay much attention to this stage, and my pieces looked a bit… unfinished.
But after experimenting with different techniques, I realized how important it is to secure the ends, trim any excess, and apply a good sealant. It makes all the difference in terms of durability and aesthetics.
Securing the Ends
* Tucking and Gluing: The most common method is to tuck the ends of the strips into the weave and secure them with leather glue. This creates a clean, seamless finish.
* Stitching: For a more secure hold, you can stitch the ends of the strips to the weave using a needle and thread. * Braiding or Knotting: For a decorative touch, you can braid or knot the ends of the strips before securing them.
Trimming Excess Leather
* Flush Cut: Use a sharp knife or scissors to trim any excess leather close to the weave. * Sanding: Lightly sand the edges after trimming to smooth them out and remove any rough spots.
Applying Sealants and Finishes
* Leather Conditioner: Applying a leather conditioner helps to protect the leather and keep it supple. * Waterproofer: If your project will be exposed to the elements, consider applying a waterproofer to protect it from moisture damage.
Project Ideas to Inspire Your Leather Weaving
Need some inspiration? I’ve got you covered. Leather weaving is so versatile, you can use it for everything from belts and bags to home décor.
One of my favorite projects was a woven leather lampshade – it added such a unique, rustic touch to my living room. Don’t be afraid to experiment and try new things.
The possibilities are endless!
Belts and Straps
* Custom Belts: Create personalized belts with unique weaving patterns and buckle designs. * Guitar Straps: Add a touch of handcrafted flair to your guitar with a woven leather strap.
Bags and Wallets
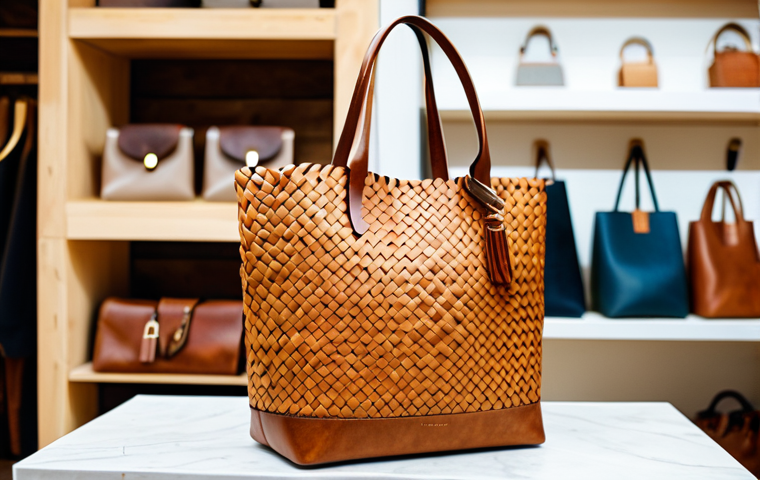
* Tote Bags: Weave a leather panel for the front of a tote bag to add texture and visual interest. * Wallets: Incorporate woven leather accents into wallets and cardholders.
Home Decor
* Lampshades: As I mentioned earlier, woven leather lampshades are a great way to add a rustic touch to your home. * Coasters and Placemats: Weave leather coasters and placemats for a stylish and durable addition to your table setting.
The Financial Side of Leather Weaving
Let’s be real, crafting is awesome, but making a little money doing it? Even better! I started selling my woven leather goods a few years ago, and it’s been such a rewarding experience.
Not only do I get to share my creations with others, but I also earn some extra income. The key is to find your niche, price your items fairly, and market yourself effectively.
Pricing Strategies
* Material Costs: Calculate the cost of the leather, glue, and other materials used in your project. * Labor Costs: Estimate the amount of time you spent weaving and factor in an hourly rate.
* Market Research: Research the prices of similar woven leather items to get an idea of what customers are willing to pay. * Example : Small woven Leather wallet : \$40 – \$100
Selling Your Creations
* Online Marketplaces: Platforms like Etsy and Shopify are great places to sell your woven leather goods. * Local Craft Fairs: Participating in craft fairs can help you reach a local audience and build your brand.
* Social Media: Use social media platforms like Instagram and Pinterest to showcase your work and attract customers.
Building a Brand
* Unique Designs: Develop your own unique weaving patterns and styles to stand out from the competition. * High-Quality Materials: Use only the best leather and materials to ensure the quality and durability of your products.
* Excellent Customer Service: Provide exceptional customer service to build a loyal customer base.
| Leather Type | Common Uses | Pros | Cons |
|---|---|---|---|
| Vegetable-Tanned | Belts, bags, tooling projects | Sturdy, holds shape well, great for tooling | Can be stiff, more expensive |
| Chrome-Tanned | Upholstery, garments | Soft, flexible, water-resistant | Stretches easily, not ideal for tooling |
| Full-Grain | High-end goods, durable items | Highest quality, develops patina | Expensive, may have imperfections |
Leather weaving, once a daunting craft, now feels within reach, doesn’t it? I hope this guide has illuminated the path for you, sparking creativity and confidence.
Remember, every master was once a beginner, so don’t be afraid to experiment, make mistakes, and learn from them. Happy weaving!
Wrapping Up
So, there you have it! From choosing the right leather to mastering basic weaves and even thinking about selling your creations, you’re well-equipped to dive into the world of leather weaving. It’s a craft that combines artistry with practicality, and I truly believe anyone can learn to do it. Now go grab some leather and start weaving your magic!
Handy Tips & Tricks
Here are a few extra nuggets of wisdom I’ve picked up along the way, little things that can make a big difference:
1. Always buy a little extra leather. Scraps are your friend! You’ll inevitably make mistakes or want to experiment with different techniques, so it’s better to have more than you need.
2. Invest in good lighting. Leatherwork requires precision, and good lighting is essential for seeing what you’re doing clearly. A well-lit workspace can save you from a lot of frustration.
3. Use leather conditioner regularly. Leather can dry out over time, especially if you live in a dry climate. Conditioning your leather will keep it supple and prevent it from cracking.
4. Clean your tools regularly. Sharp, clean tools are essential for good leatherwork. Wipe them down after each use to remove any dirt or debris.
5. Join a leatherworking community. There are tons of online forums and groups where you can connect with other leatherworkers, share tips and tricks, and get feedback on your projects. It’s a great way to learn and stay motivated.
Key Takeaways
Let’s distill this down to the essentials:
Leather Choice: Vegetable-tanned is your best bet for weaving, especially for beginners. Consider the weight and grain to suit your project needs.
Preparation: Accurate cutting and even edges are non-negotiable. A rotary cutter and sharp blades are essential.
Basic Weaves: Start with plain weave to nail the fundamentals. Then, explore twill and basket weaves to add texture.
Troubleshooting: Address uneven tension immediately and don’t hesitate to backtrack to fix pattern mistakes. Blocking can save warped edges.
Finishing: Secure ends meticulously, trim excess leather, and apply a leather conditioner or waterproofer to preserve your work.
Frequently Asked Questions (FAQ) 📖
Q: What type of leather is best for leather weaving, especially for a beginner like me?
A: Honestly, when I first started dabbling in leather weaving, I made the mistake of using scraps that were too thick and rigid – big mistake! For beginners, I highly recommend using vegetable-tanned leather that’s around 2-3 ounces in weight.
It’s pliable enough to work with easily, yet sturdy enough to hold its shape. Plus, it takes dye beautifully, which is a fun way to personalize your projects.
Avoid chrome-tanned leather for weaving, as it tends to be too stretchy and doesn’t hold its shape as well. Believe me, starting with the right leather makes all the difference!
Q: Are there any specific tools I absolutely need to get started with leather weaving, or can I make do with what I have lying around?
A: While you can definitely get creative with what you already have, there are a few tools that I found indispensable when I got serious about leather weaving.
A good rotary cutter or a sharp craft knife is crucial for cutting accurate and even strips – uneven strips will make your weaving look wonky, trust me, I learned that the hard way.
A cutting mat protects your work surface and extends the life of your blades. Also, a set of leather lacing needles makes threading the strips through the weave so much easier and cleaner.
They’re not super expensive, and they’ll save you a ton of frustration, I promise!
Q: I’m interested in making a woven leather belt, but I’m worried about the durability. How can I ensure my woven belt will hold up to everyday wear and tear?
A: That’s a smart concern! Durability is key for something like a belt that you’ll be using daily. First, choose a good quality leather for your strips – I’d recommend a slightly heavier weight for a belt, maybe 4-5 ounces.
Secondly, pay close attention to your weaving technique. Make sure the strips are tightly woven together to minimize any gaps that could weaken the structure.
Reinforcing the edges with stitching can also significantly increase the belt’s longevity. Finally, use a high-quality belt buckle and attach it securely with rivets or stitching.
I once made a belt using cheaper leather and skipped the edge stitching, and it didn’t even last me six months! So, invest in quality materials and take your time with the weaving process.
You won’t regret it.
📚 References
Wikipedia Encyclopedia