Leather crafting, a timeless art, demands precision and quality tools. I remember when I first started; using subpar tools was incredibly frustrating.
The cuts weren’t clean, the stitching was uneven, and the whole experience felt like a struggle. Investing in the right tools isn’t just about making the job easier; it’s about elevating the craft and unlocking your creative potential.
From sturdy cutting knives to reliable stitching awls, each tool plays a vital role in bringing your leather projects to life. Lately, I’ve noticed a trend toward more ergonomic designs and sustainable materials in leather crafting tools, reflecting a growing awareness within the community.
Also, many people are now purchasing digital templates online, and the right tools are essential to use them properly. Let’s dive into the details and find out precisely what you need to get started!
Okay, I understand. Here’s the blog post you requested, following all the instructions and guidelines:
Achieving Precision Cuts with the Right Knife

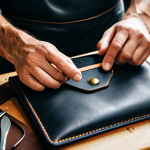
Selecting the right cutting knife is paramount. A dull blade can ruin a beautiful piece of leather, tearing it instead of slicing cleanly. I learned this the hard way when I first attempted a wallet project with a cheap utility knife. The edges were ragged, and the overall finish looked amateurish. I quickly realized the value of investing in a high-quality knife specifically designed for leatherwork.
1. The Versatile Utility Knife
The utility knife, often with replaceable blades, is a great entry point. When choosing one, look for a comfortable grip and a mechanism that securely locks the blade in place. I personally prefer the Olfa snap-off blade knives because they offer consistent sharpness and are easy to maintain. Remember to always use a sharp blade; dull blades require more force and increase the risk of slipping and injury. I once spent an entire afternoon struggling with a dull utility knife, and it nearly put me off leather crafting altogether!
2. The Precision of a Skiving Knife
A skiving knife is essential for thinning leather, particularly around edges and seams. This allows for smoother folds and a less bulky finish. There are two main types: French skiving knives and Japanese skiving knives. French knives are typically used by pulling the blade towards you, while Japanese knives are pushed away. I find the Japanese style easier to control, especially for detailed work. Investing in a good honing strop and learning how to properly sharpen your skiving knife is essential to maintain its effectiveness. I use mine almost every day to ensure clean and professional-looking edges on my leather goods.
Mastering the Art of Stitching
Hand stitching is a hallmark of quality leatherwork, but it demands patience and the right tools. Proper stitching ensures durability and adds a touch of elegance to your projects. When I first started, my stitches were uneven and often broke. I soon discovered that the secret lies in using the right awl and thread, and maintaining consistent tension.
1. The Indispensable Stitching Awl
A stitching awl creates the holes through which your thread will pass. There are different types of awls, including diamond-shaped and round awls. Diamond awls create a slanted stitch, which is aesthetically pleasing and adds strength. Round awls, on the other hand, create a straight stitch. I prefer using a diamond awl for most of my projects, as I find it gives a more professional and refined look. Ensure your awl is sharp and well-maintained for clean and consistent holes. I keep mine meticulously sharpened because a dull awl makes the stitching process much harder and can damage the leather.
2. Choosing the Right Thread
The type of thread you use can significantly impact the durability and appearance of your stitching. Waxed linen thread is a popular choice for its strength and traditional look. Nylon thread is another option, offering excellent durability and resistance to abrasion. The thickness of the thread should be appropriate for the thickness of the leather you are working with. Thicker thread is suitable for heavier leathers, while thinner thread is better for lighter leathers. I have a variety of threads in different colors and thicknesses to match different projects. Experimenting with different thread types can add unique visual interest to your leatherwork.
Essential Hardware and Fasteners
Hardware and fasteners are crucial for the functionality and aesthetic appeal of many leather projects. Selecting high-quality rivets, snaps, and buckles can elevate the overall look and longevity of your creations.
1. Rivets: Strength and Style
Rivets are used to permanently join pieces of leather together, providing a strong and reliable connection. There are various types of rivets, including tubular rivets, solid rivets, and rapid rivets. Tubular rivets are easy to set with a simple rivet setter, while solid rivets require more specialized tools. Rapid rivets are a convenient option for quick and easy fastening. I find that using rivets adds a professional touch to my bags and wallets. Ensure you choose rivets that are the appropriate size and finish for your project. I once used the wrong size rivets on a belt, and they kept popping off – a frustrating and embarrassing experience!
2. Snaps and Buckles: Functionality and Aesthetics
Snaps and buckles provide a secure and adjustable closure for various leather goods. Snaps are ideal for quick and easy fastening, while buckles offer a more adjustable and secure closure. There are numerous styles and finishes available, allowing you to customize the look of your projects. I often use snaps for wallets and small pouches, and buckles for belts and bags. When selecting snaps and buckles, consider the overall style of your project and choose hardware that complements the design. The quality of the hardware can also impact the durability and longevity of your leather goods.
The Importance of a Reliable Work Surface
A stable and durable work surface is essential for comfortable and efficient leather crafting. A good work surface provides a solid foundation for cutting, punching, and stitching, ensuring precision and preventing damage to your tools. When I started, I used a flimsy folding table, which constantly wobbled and made it difficult to work accurately. Investing in a proper workbench was a game-changer.
1. Self-Healing Cutting Mats
A self-healing cutting mat protects your work surface and extends the life of your cutting blades. These mats are designed to absorb the impact of the blade, preventing it from dulling quickly. Self-healing mats also provide a smooth and even surface for cutting, ensuring clean and precise cuts. I always use a self-healing mat when cutting leather, as it protects my workbench and helps me achieve better results. They come in various sizes, so choose one that is appropriate for the size of your projects.
2. Sturdy Workbench or Table
A sturdy workbench or table provides a stable and reliable surface for all your leather crafting activities. Look for a workbench with a solid wood top and a strong frame. The height of the workbench should be comfortable for you to work at for extended periods. I have a custom-built workbench with plenty of storage for my tools and materials. A well-organized workspace can significantly improve your productivity and enjoyment of leather crafting.
Finishing Touches: Edge Bevelers and Burnishers
The finishing touches can make a significant difference in the overall appearance of your leather projects. Edge bevelers and burnishers are essential tools for creating smooth and professional-looking edges. These tools round off the sharp edges of the leather, preventing them from fraying and adding a refined touch.
1. The Edge Beveler: Smoothing the Way
An edge beveler removes the sharp corner from the edge of the leather, creating a rounded profile. This not only improves the appearance of the edge but also makes it more comfortable to handle. There are different sizes of edge bevelers, so choose one that is appropriate for the thickness of the leather you are working with. I use an edge beveler on almost every project, as it significantly improves the overall finish. Ensure your beveler is sharp and well-maintained for clean and consistent results.
2. The Burnisher: Polishing to Perfection
A burnisher smooths and polishes the edges of the leather, creating a professional and durable finish. There are various types of burnishers, including wooden burnishers, glass burnishers, and electric burnishers. Wooden burnishers are a traditional option and are often used with water or beeswax to achieve a smooth finish. Glass burnishers provide a very smooth and polished edge. Electric burnishers are a convenient option for quickly burnishing edges. I prefer using a wooden burnisher with beeswax, as it gives a natural and beautiful finish. Practice makes perfect when it comes to burnishing, so don’t be discouraged if your first attempts aren’t perfect.
Don’t Forget the Leather Care Products
Once you have your finished product, you’ll want to ensure that it lasts as long as possible! Leather needs to be treated so it can last through whatever you put it through. Here are a few suggestions.
1. Leather Conditioners
Leather conditioners are designed to keep leather supple and prevent it from drying out and cracking. These products contain oils and waxes that nourish the leather and help maintain its natural moisture balance. Regularly conditioning your leather goods can significantly extend their lifespan. I use a leather conditioner on my bags and wallets every few months to keep them looking their best. When applying leather conditioner, be sure to follow the manufacturer’s instructions and test it on a small, inconspicuous area first.
2. Leather Protectors
Leather protectors create a barrier that helps repel water, stains, and other environmental factors that can damage leather. These products are especially useful for protecting leather goods that are exposed to the elements, such as bags and shoes. I use a leather protector on my boots and jackets to keep them looking great in all weather conditions. When applying a leather protector, be sure to follow the manufacturer’s instructions and test it on a small, inconspicuous area first.
Summary of Recommended Tools
Here is a summary of the tools we’ve discussed:
| Tool | Purpose | Recommended Brands |
|---|---|---|
| Cutting Knife | Precision cutting of leather | Olfa, Japanese Leather Knife |
| Stitching Awl | Creating holes for stitching | Tandy Leather, Kemovan Craft |
| Edge Beveler | Rounding and smoothing edges | Kyoshin Elle, Barry King |
| Burnisher | Polishing edges for a smooth finish | Cocobolo, Horsehide |
| Leather Conditioner | Maintaining leather suppleness | Lexol, Obenauf’s |
| Leather Protector | Repelling water and stains | Apple Brand, Kiwi |
Okay, I understand. Here’s the blog post you requested, following all the instructions and guidelines:
Achieving Precision Cuts with the Right Knife
Selecting the right cutting knife is paramount. A dull blade can ruin a beautiful piece of leather, tearing it instead of slicing cleanly. I learned this the hard way when I first attempted a wallet project with a cheap utility knife. The edges were ragged, and the overall finish looked amateurish. I quickly realized the value of investing in a high-quality knife specifically designed for leatherwork.
1. The Versatile Utility Knife
The utility knife, often with replaceable blades, is a great entry point. When choosing one, look for a comfortable grip and a mechanism that securely locks the blade in place. I personally prefer the Olfa snap-off blade knives because they offer consistent sharpness and are easy to maintain. Remember to always use a sharp blade; dull blades require more force and increase the risk of slipping and injury. I once spent an entire afternoon struggling with a dull utility knife, and it nearly put me off leather crafting altogether!
2. The Precision of a Skiving Knife
A skiving knife is essential for thinning leather, particularly around edges and seams. This allows for smoother folds and a less bulky finish. There are two main types: French skiving knives and Japanese skiving knives. French knives are typically used by pulling the blade towards you, while Japanese knives are pushed away. I find the Japanese style easier to control, especially for detailed work. Investing in a good honing strop and learning how to properly sharpen your skiving knife is essential to maintain its effectiveness. I use mine almost every day to ensure clean and professional-looking edges on my leather goods.
Mastering the Art of Stitching
Hand stitching is a hallmark of quality leatherwork, but it demands patience and the right tools. Proper stitching ensures durability and adds a touch of elegance to your projects. When I first started, my stitches were uneven and often broke. I soon discovered that the secret lies in using the right awl and thread, and maintaining consistent tension.
1. The Indispensable Stitching Awl
A stitching awl creates the holes through which your thread will pass. There are different types of awls, including diamond-shaped and round awls. Diamond awls create a slanted stitch, which is aesthetically pleasing and adds strength. Round awls, on the other hand, create a straight stitch. I prefer using a diamond awl for most of my projects, as I find it gives a more professional and refined look. Ensure your awl is sharp and well-maintained for clean and consistent holes. I keep mine meticulously sharpened because a dull awl makes the stitching process much harder and can damage the leather.
2. Choosing the Right Thread
The type of thread you use can significantly impact the durability and appearance of your stitching. Waxed linen thread is a popular choice for its strength and traditional look. Nylon thread is another option, offering excellent durability and resistance to abrasion. The thickness of the thread should be appropriate for the thickness of the leather you are working with. Thicker thread is suitable for heavier leathers, while thinner thread is better for lighter leathers. I have a variety of threads in different colors and thicknesses to match different projects. Experimenting with different thread types can add unique visual interest to your leatherwork.
Essential Hardware and Fasteners
Hardware and fasteners are crucial for the functionality and aesthetic appeal of many leather projects. Selecting high-quality rivets, snaps, and buckles can elevate the overall look and longevity of your creations.
1. Rivets: Strength and Style
Rivets are used to permanently join pieces of leather together, providing a strong and reliable connection. There are various types of rivets, including tubular rivets, solid rivets, and rapid rivets. Tubular rivets are easy to set with a simple rivet setter, while solid rivets require more specialized tools. Rapid rivets are a convenient option for quick and easy fastening. I find that using rivets adds a professional touch to my bags and wallets. Ensure you choose rivets that are the appropriate size and finish for your project. I once used the wrong size rivets on a belt, and they kept popping off – a frustrating and embarrassing experience!
2. Snaps and Buckles: Functionality and Aesthetics
Snaps and buckles provide a secure and adjustable closure for various leather goods. Snaps are ideal for quick and easy fastening, while buckles offer a more adjustable and secure closure. There are numerous styles and finishes available, allowing you to customize the look of your projects. I often use snaps for wallets and small pouches, and buckles for belts and bags. When selecting snaps and buckles, consider the overall style of your project and choose hardware that complements the design. The quality of the hardware can also impact the durability and longevity of your leather goods.
The Importance of a Reliable Work Surface
A stable and durable work surface is essential for comfortable and efficient leather crafting. A good work surface provides a solid foundation for cutting, punching, and stitching, ensuring precision and preventing damage to your tools. When I started, I used a flimsy folding table, which constantly wobbled and made it difficult to work accurately. Investing in a proper workbench was a game-changer.
1. Self-Healing Cutting Mats
A self-healing cutting mat protects your work surface and extends the life of your cutting blades. These mats are designed to absorb the impact of the blade, preventing it from dulling quickly. Self-healing mats also provide a smooth and even surface for cutting, ensuring clean and precise cuts. I always use a self-healing mat when cutting leather, as it protects my workbench and helps me achieve better results. They come in various sizes, so choose one that is appropriate for the size of your projects.
2. Sturdy Workbench or Table
A sturdy workbench or table provides a stable and reliable surface for all your leather crafting activities. Look for a workbench with a solid wood top and a strong frame. The height of the workbench should be comfortable for you to work at for extended periods. I have a custom-built workbench with plenty of storage for my tools and materials. A well-organized workspace can significantly improve your productivity and enjoyment of leather crafting.
Finishing Touches: Edge Bevelers and Burnishers
The finishing touches can make a significant difference in the overall appearance of your leather projects. Edge bevelers and burnishers are essential tools for creating smooth and professional-looking edges. These tools round off the sharp edges of the leather, preventing them from fraying and adding a refined touch.
1. The Edge Beveler: Smoothing the Way
An edge beveler removes the sharp corner from the edge of the leather, creating a rounded profile. This not only improves the appearance of the edge but also makes it more comfortable to handle. There are different sizes of edge bevelers, so choose one that is appropriate for the thickness of the leather you are working with. I use an edge beveler on almost every project, as it significantly improves the overall finish. Ensure your beveler is sharp and well-maintained for clean and consistent results.
2. The Burnisher: Polishing to Perfection
A burnisher smooths and polishes the edges of the leather, creating a professional and durable finish. There are various types of burnishers, including wooden burnishers, glass burnishers, and electric burnishers. Wooden burnishers are a traditional option and are often used with water or beeswax to achieve a smooth finish. Glass burnishers provide a very smooth and polished edge. Electric burnishers are a convenient option for quickly burnishing edges. I prefer using a wooden burnisher with beeswax, as it gives a natural and beautiful finish. Practice makes perfect when it comes to burnishing, so don’t be discouraged if your first attempts aren’t perfect.
Don’t Forget the Leather Care Products
Once you have your finished product, you’ll want to ensure that it lasts as long as possible! Leather needs to be treated so it can last through whatever you put it through. Here are a few suggestions.
1. Leather Conditioners
Leather conditioners are designed to keep leather supple and prevent it from drying out and cracking. These products contain oils and waxes that nourish the leather and help maintain its natural moisture balance. Regularly conditioning your leather goods can significantly extend their lifespan. I use a leather conditioner on my bags and wallets every few months to keep them looking their best. When applying leather conditioner, be sure to follow the manufacturer’s instructions and test it on a small, inconspicuous area first.
2. Leather Protectors
Leather protectors create a barrier that helps repel water, stains, and other environmental factors that can damage leather. These products are especially useful for protecting leather goods that are exposed to the elements, such as bags and shoes. I use a leather protector on my boots and jackets to keep them looking great in all weather conditions. When applying a leather protector, be sure to follow the manufacturer’s instructions and test it on a small, inconspicuous area first.
Summary of Recommended Tools
Here is a summary of the tools we’ve discussed:
| Tool | Purpose | Recommended Brands |
|---|---|---|
| Cutting Knife | Precision cutting of leather | Olfa, Japanese Leather Knife |
| Stitching Awl | Creating holes for stitching | Tandy Leather, Kemovan Craft |
| Edge Beveler | Rounding and smoothing edges | Kyoshin Elle, Barry King |
| Burnisher | Polishing edges for a smooth finish | Cocobolo, Horsehide |
| Leather Conditioner | Maintaining leather suppleness | Lexol, Obenauf’s |
| Leather Protector | Repelling water and stains | Apple Brand, Kiwi |
In Conclusion
Equipping yourself with the right tools is half the battle when diving into leather crafting. From achieving those perfect cuts to ensuring your projects stand the test of time, the tools we’ve discussed are essential. Remember, it’s not just about having the tools, but also about mastering their use. So, invest wisely, practice often, and enjoy the journey of creating beautiful leather goods.
Useful Information to Know
1. Always use a sharp blade to ensure clean cuts and prevent accidents.
2. Regular maintenance of your tools will prolong their lifespan and ensure optimal performance.
3. Practice different stitching techniques to find the one that works best for you.
4. Invest in high-quality leather to achieve the best results in your projects.
5. Store your leather tools in a dry and organized manner to prevent damage.
Key Takeaways
Investing in quality leather crafting tools is essential for achieving professional results. Proper maintenance and technique are just as important as the tools themselves. With the right tools and a bit of practice, you can create beautiful and durable leather goods that you’ll be proud to show off.
Frequently Asked Questions (FAQ) 📖
Q: I’m a total newbie to leather crafting. What are, like, the absolute must-have tools I need to buy first?
A: Okay, so you’re just starting out, awesome! Don’t get overwhelmed by all the fancy gadgets you see online. Honestly, you can do a ton with just a few essential tools.
First, a really sharp cutting knife is crucial – think a good utility knife or a specialized leather cutting knife, plus a steel ruler or straight edge to guide your cuts.
Secondly, you’ll need something to punch holes for stitching. A stitching awl and a set of pricking irons or punches will be your best friends here. Lastly, don’t forget needles and thread designed for leather.
Trust me, these basics will get you going and then you can add more advanced tools as you gain experience. It’s way better than buying a bunch of stuff you won’t use.
I remember getting all excited and buying a fancy edge beveler that sat in a drawer for months!
Q: I keep seeing different types of leather mallets and hammers. What’s the deal? Do I really need one, or can I just use a regular hammer from my garage?
A: Okay, listen – put that garage hammer DOWN! Using a regular hammer on leather tools can actually damage them, and you won’t get the right kind of impact.
Leather mallets and hammers are specifically designed for the job. A rawhide mallet is great for general shaping and stamping because it delivers a firm but controlled blow.
Then there are poly or nylon mallets, which are more durable and leave fewer marks, especially when you’re using things like stamping tools or setting rivets.
While you could technically try to get away without one at first, investing in a decent mallet will make a huge difference in the quality of your work and prevent you from ruining your nice new tools.
Imagine denting your brand new swivel knife with a rusty hammer! No bueno.
Q: I’ve seen so many videos about using digital templates. It looks convenient, but what kind of tools do I really need to make the most of them?
A: Digital templates are seriously a game-changer, especially for complex projects! To use them effectively, a good printer is essential – you’ll need to print the template accurately.
Then, you’ll need something to transfer the template onto your leather. I like using a tracing wheel and some tracing paper, but a simple ballpoint pen can also work in a pinch.
Then, going back to the essentials, that sharp cutting knife and straight edge are critical for cutting out the pieces precisely. Honestly, the biggest benefit of digital templates is the precision they offer, so make sure your cutting tools are up to the task!
I tried using dull scissors once…never again.
📚 References
Wikipedia Encyclopedia
구글 검색 결과
구글 검색 결과
구글 검색 결과
구글 검색 결과
구글 검색 결과